DeVILSona Game User Guide
This document provides a comprehensive guide to DeVILSona, covering everything from basic controls and account creation to the AI interview system and scenario progression.
1. Basic Game Menu
1.1 Basic Controls
Basic movement and interactions in the game are intuitively controlled via VR/Console controllers (joystick).
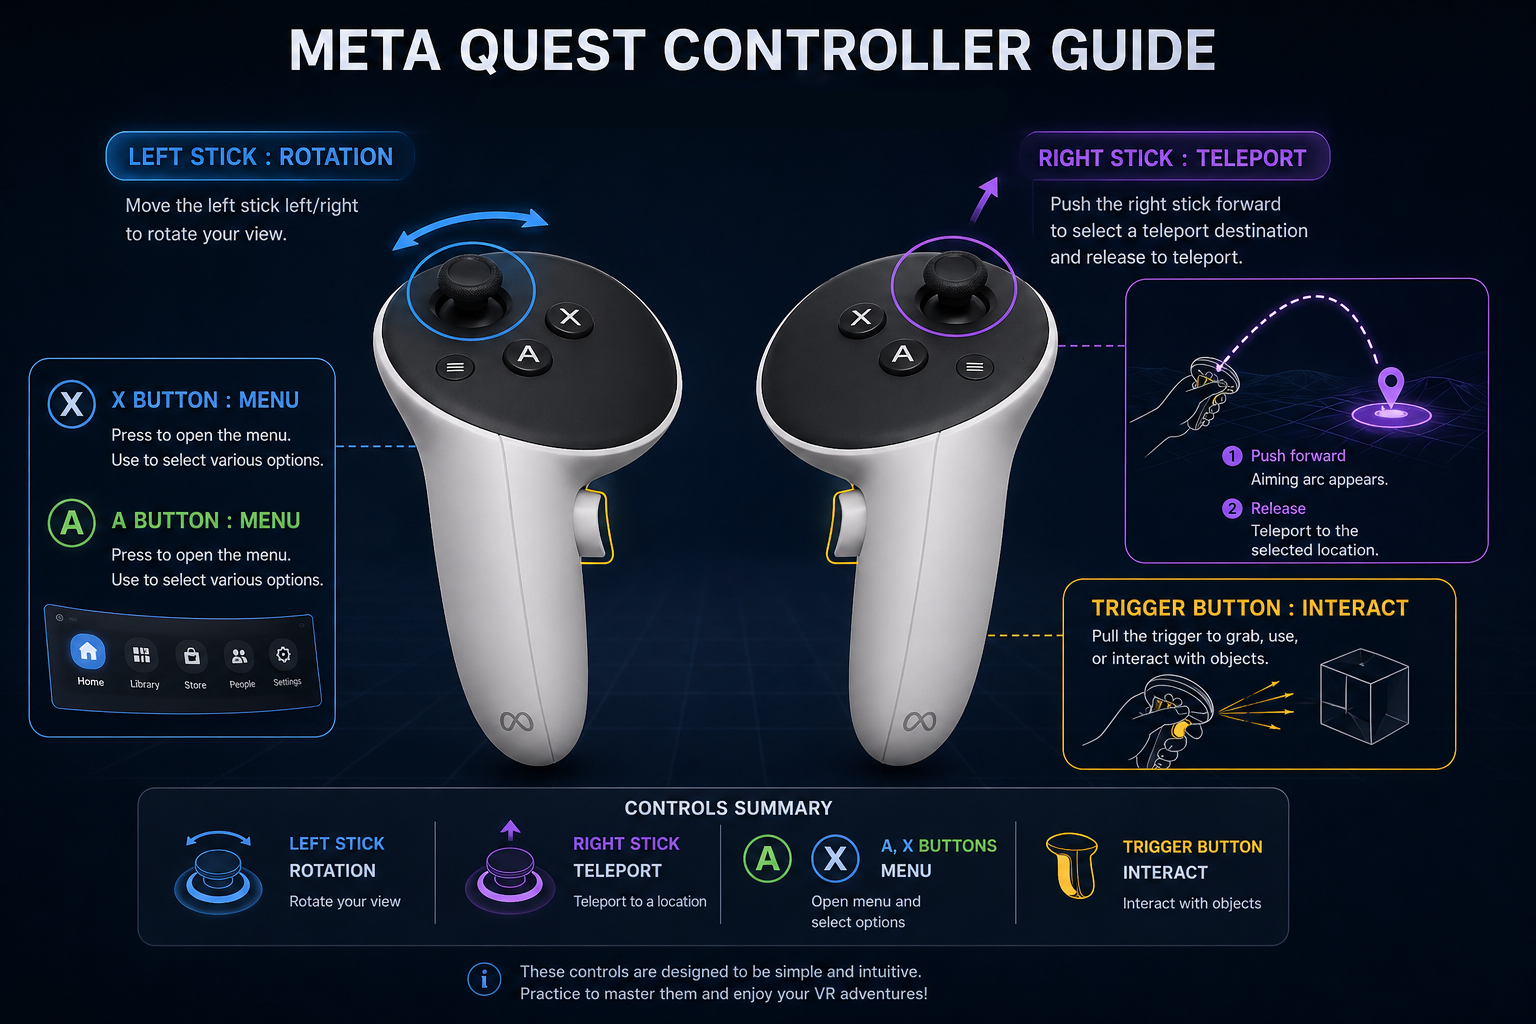
Note: (Please insert the joystick controls screenshot here.)
- Right Joystick: Move the character
- Left Joystick: Rotate the camera/view
- Trigger / Button Click: Interact with objects and NPCs
- A / X Button: Summon the Quick Menu (Smartwatch)
1.2 Agreement & Credits
When you start or log into the game for the first time, a data collection agreement screen will appear.
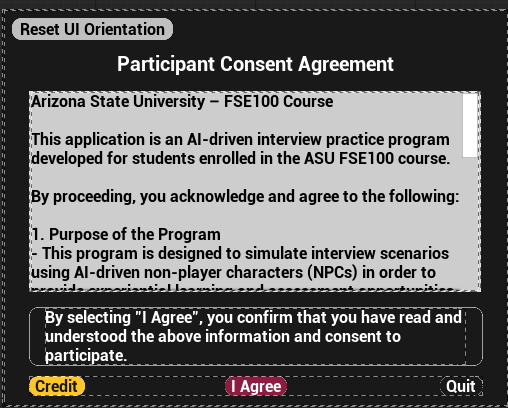
- Agreement: This is an agreement to collect minimal basic data necessary for smooth gameplay (such as AI interview analysis). You must agree to proceed with the game.
- Credits: Click the [Credit] button at the bottom of the screen to view the list of developers and contributors who participated in creating the DeVILSona project.
1.3 Quick Menu (Watch)
You can call up the quick menu using your smartwatch at any time during gameplay.
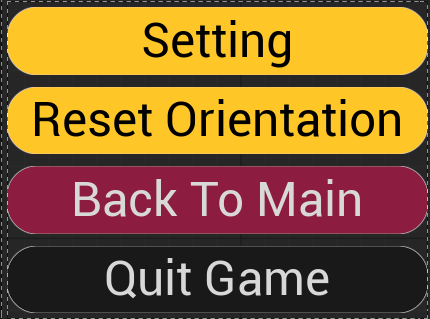
- How to Access: Aim at your left wristwatch and press the Interact button, or simply press the A / X Button on your controller to open the quick menu.
- Usage: Use the quick menu to rapidly access various convenient features, such as checking your game progress or opening detailed settings.
2. Save and Login
The game features an Auto-save system that works in the background during most stages of gameplay, safely preserving your progress without the need for manual saves.
2.1 How to Create an Account
New users can create a new profile by clicking the [Create Account] button in the center of the main menu.
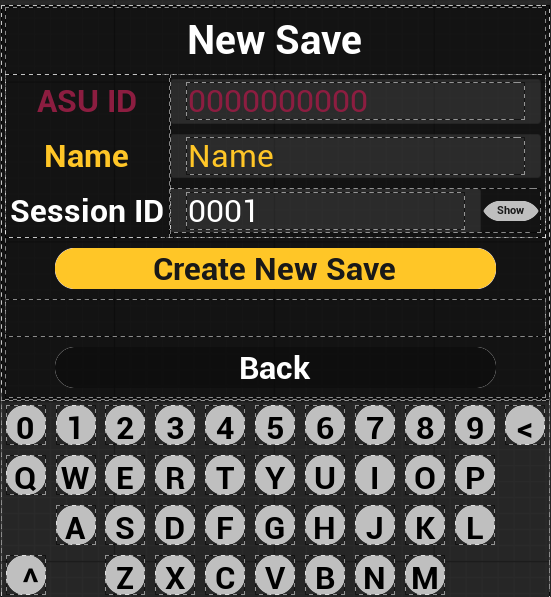
- Enter ASU ID: Enter your unique ASU ID.
- Assign Session ID: Set a unique Session ID to save your game data. If you leave it blank, it will automatically default to
0001. - Enter Name: Enter the name you wish to use in the game.
- Save: Once all information is entered, press the Save button to complete account creation.
2.2 Login
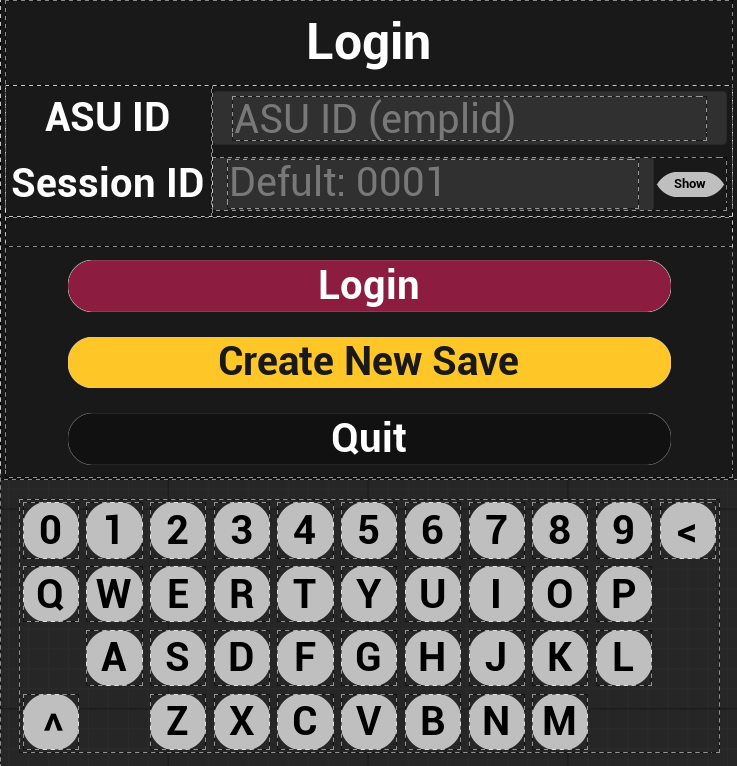
- If you have already created an account or have a previous play record, enter your ASU ID and Session ID on the main login screen to log in.
- Upon successful login, you can load your game and continue playing from your last auto-saved point.
3. Settings and Options
You can optimize your gameplay experience by accessing the Settings via the main menu or the smartwatch quick menu.
3.1 Graphic Change
 * MetaHuman Quality: Changing graphic settings adjusts the resolution and detail quality of the MetaHuman characters (such as AI interviewers).
* Optimization Tip: If you experience lagging or frame drops during gameplay, try lowering this graphic quality option for smoother performance.
* MetaHuman Quality: Changing graphic settings adjusts the resolution and detail quality of the MetaHuman characters (such as AI interviewers).
* Optimization Tip: If you experience lagging or frame drops during gameplay, try lowering this graphic quality option for smoother performance.
3.2 Speech to Text & Text Input
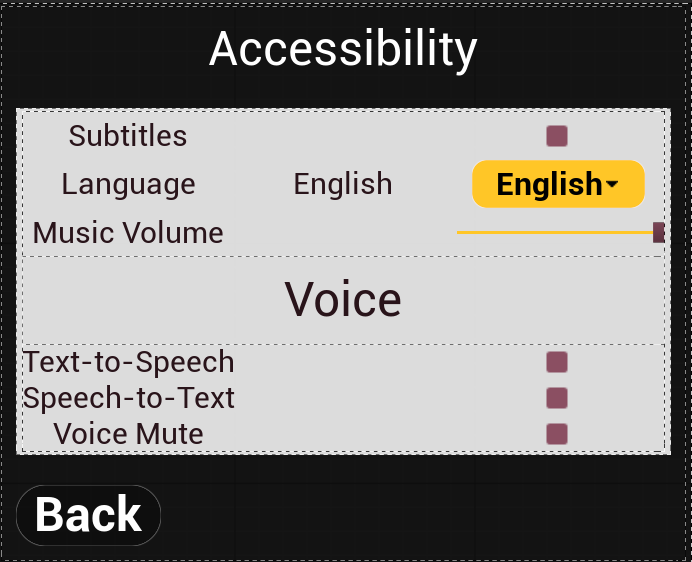 * Speech to Text (Default: ON): This feature uses your microphone to recognize your voice for conversation. It is enabled by default. If you prefer not to use your microphone, you can change this setting to OFF.
* Text to Speech (Virtual Keyboard Mode): If you wish to communicate via text instead of voice, turn this feature on. During an interview, a small virtual keyboard will appear on the screen, allowing you to type your questions and converse with the interviewer.
* Speech to Text (Default: ON): This feature uses your microphone to recognize your voice for conversation. It is enabled by default. If you prefer not to use your microphone, you can change this setting to OFF.
* Text to Speech (Virtual Keyboard Mode): If you wish to communicate via text instead of voice, turn this feature on. During an interview, a small virtual keyboard will appear on the screen, allowing you to type your questions and converse with the interviewer.
3.3 Volume Control
- Background Music (BGM): You can adjust the volume level of the in-game background music.
- Mute MetaHuman Voice: If you prefer not to hear the AI MetaHuman's voice or want to focus solely on the subtitles, you can disable (OFF) the MetaHuman voice output in the settings.
4. Interview System
4.1 Basic Flow & Character Selection
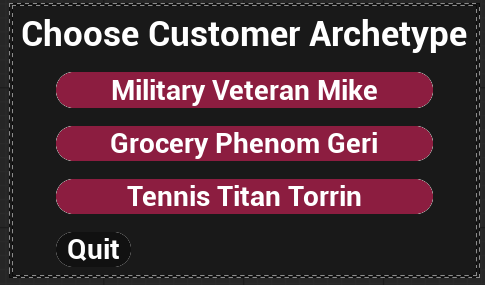
- Choose Character Archetype: First, select the character archetype you want to interview. (Currently, only the military veteran Mike is available.)
 2. Enter the Interview Room: After making your selection, enter the interview location and interact with Mike to begin the interview.
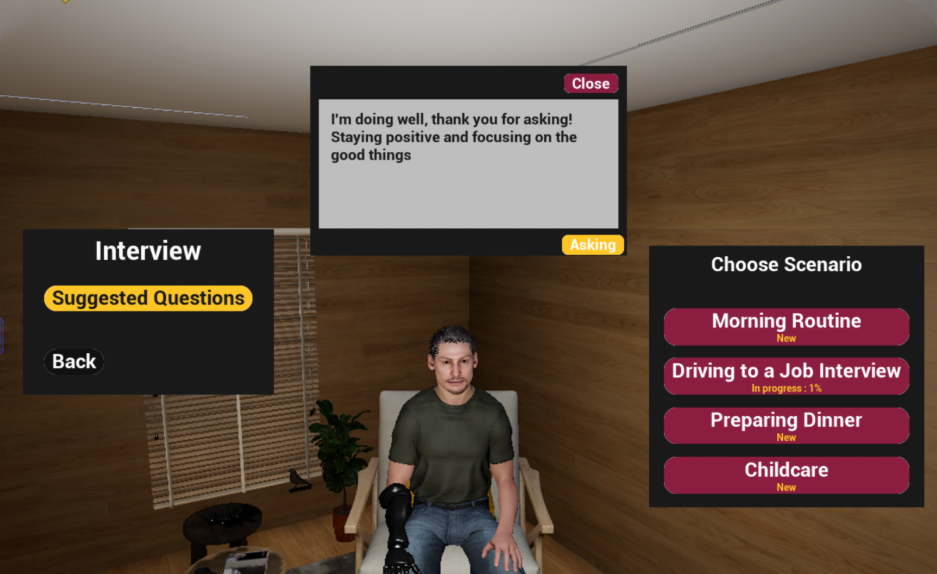
4.2 Interview With AI (Real-time Generative AI Mode)
Under a normal network environment, you can have a real-time conversation powered by generative AI.
Voice Conversation (STT): With the microphone (STT) enabled, Mike will listen to your spoken questions and answer in real-time.
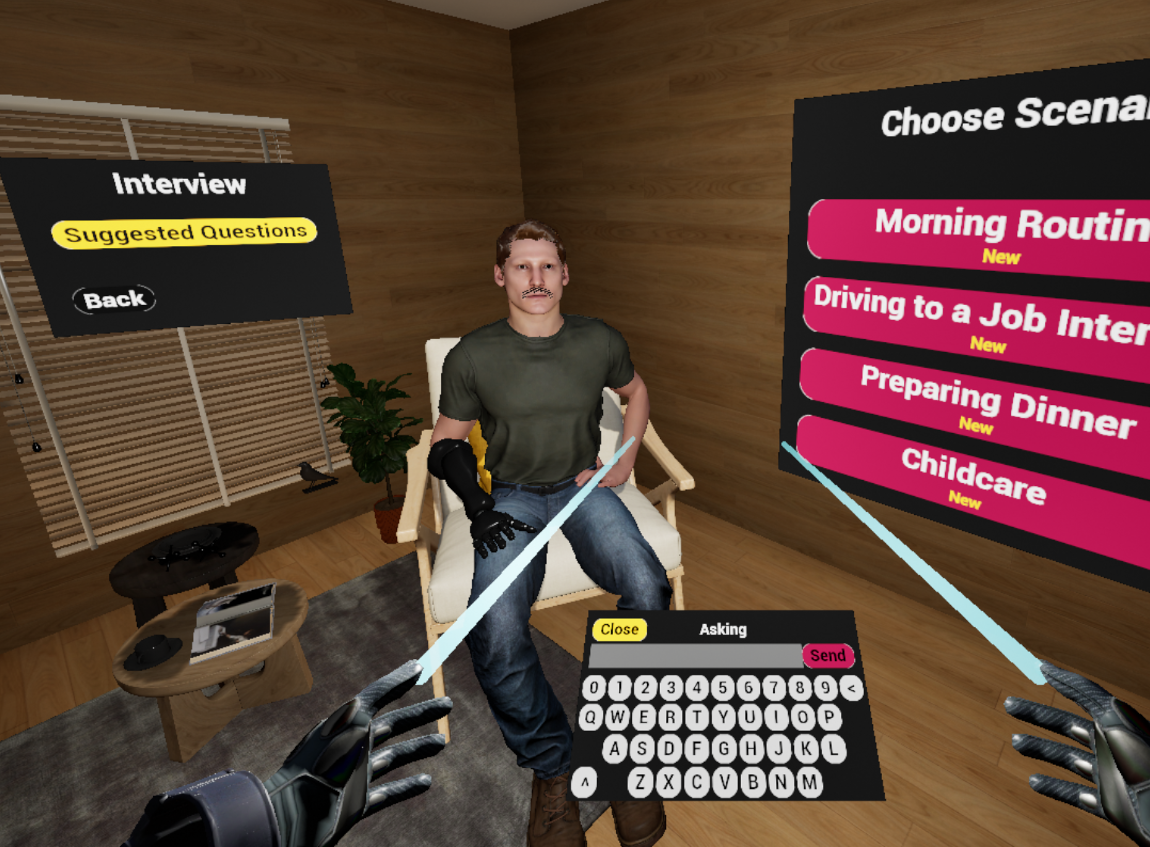 Text Conversation (TTS Enabled): If you are in an environment where you cannot use a microphone, enable Text to Speech in the settings to type your questions using the virtual keyboard.
 Choose Questions: If you are unsure what to ask during the conversation, select [Choose Questions] from the menu to use example questions provided by the system.
4.3 Interview Without AI (Offline / Scripted Mode)
If your internet connection drops or the OpenAI servers go down, the game automatically switches to Offline Mode. Feature Limitations: Both STT (voice recognition) and TTS (text input for AI responses) features will be disabled. Scripted Dialogue: Do not panic; simply select [Choose Questions]. Clicking on an example question will display a pre-written scripted response, allowing you to seamlessly continue the interview.
5. Scenarios
You can select and play specific role-playing scenarios within the interview location.
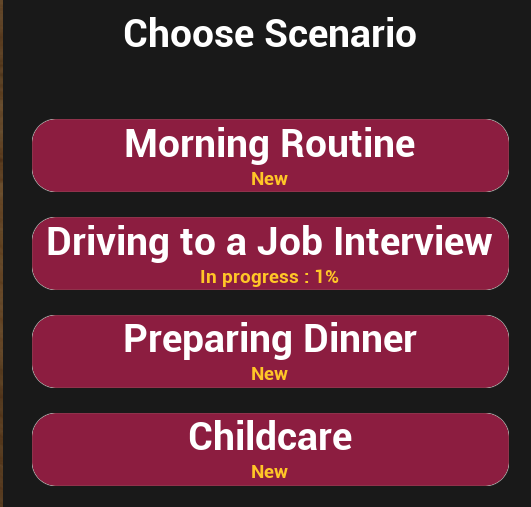
5.1 Scenario Selection Window
Location: Upon entering any character's interview room, look to your right to find the dedicated Scenario Selection UI.
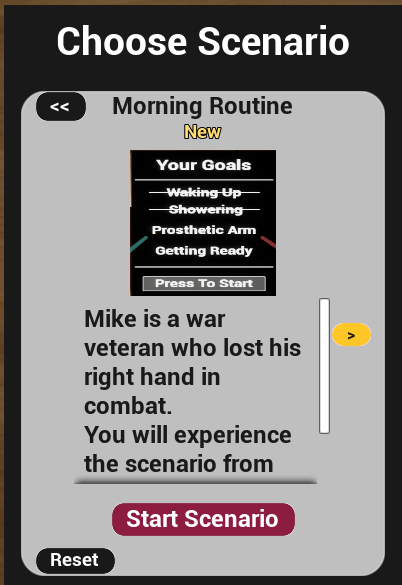
View Details: Select a scenario to see a brief image and description of it.
Last Played: The bottom of the window displays the last time you played that scenario. If it is your first time trying it, a NEW badge will be displayed.
5.2 Reset & Play Scenarios
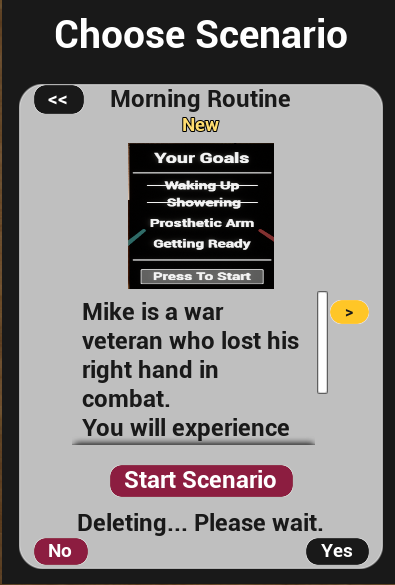
Reset: If you want to reset the progress of a previously played scenario, press the [Reset] button.
⚠️ Caution: Please wait for about 5 seconds after resetting to ensure the data is safely saved to the server. Play: When you are ready, press the [Play] button. You will be teleported to the specific location for your chosen scenario (e.g., Scenario 1 location) to begin playing.